

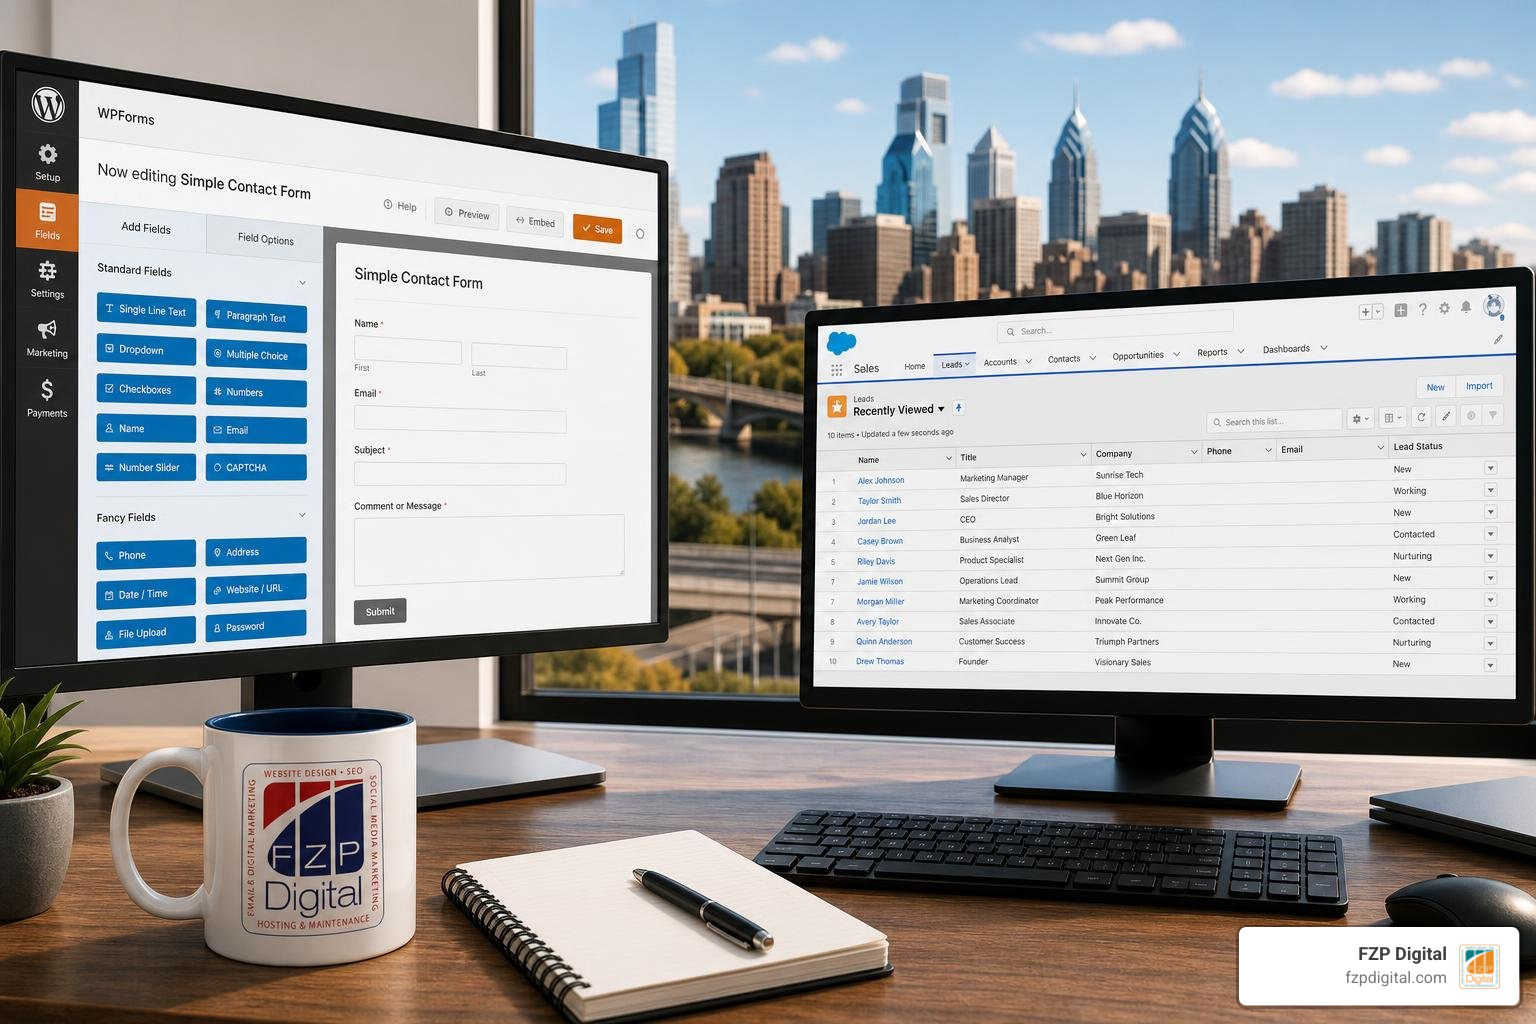
How WPForms Salesforce Integration Sends Leads to Your CRM
To connect WPForms with Salesforce, install the WPForms Salesforce addon, create a Connected App in Salesforce, and authorize the connection in WordPress. Then choose the Salesforce record you want to create, map your form fields, and submit a test entry to make sure it arrives.
You’ll need a WPForms Elite license, a secure HTTPS website, and a Salesforce edition with API access. Once the connection works, you can use conditional logic to send only the submissions your team needs. No more copying every inquiry by hand.
I’m Fred Z. Poritsky. My background in nonprofit financial management and WordPress web design shapes how I approach wpforms salesforce integration: as a practical way to help your team spend less time on data entry and more time following up.
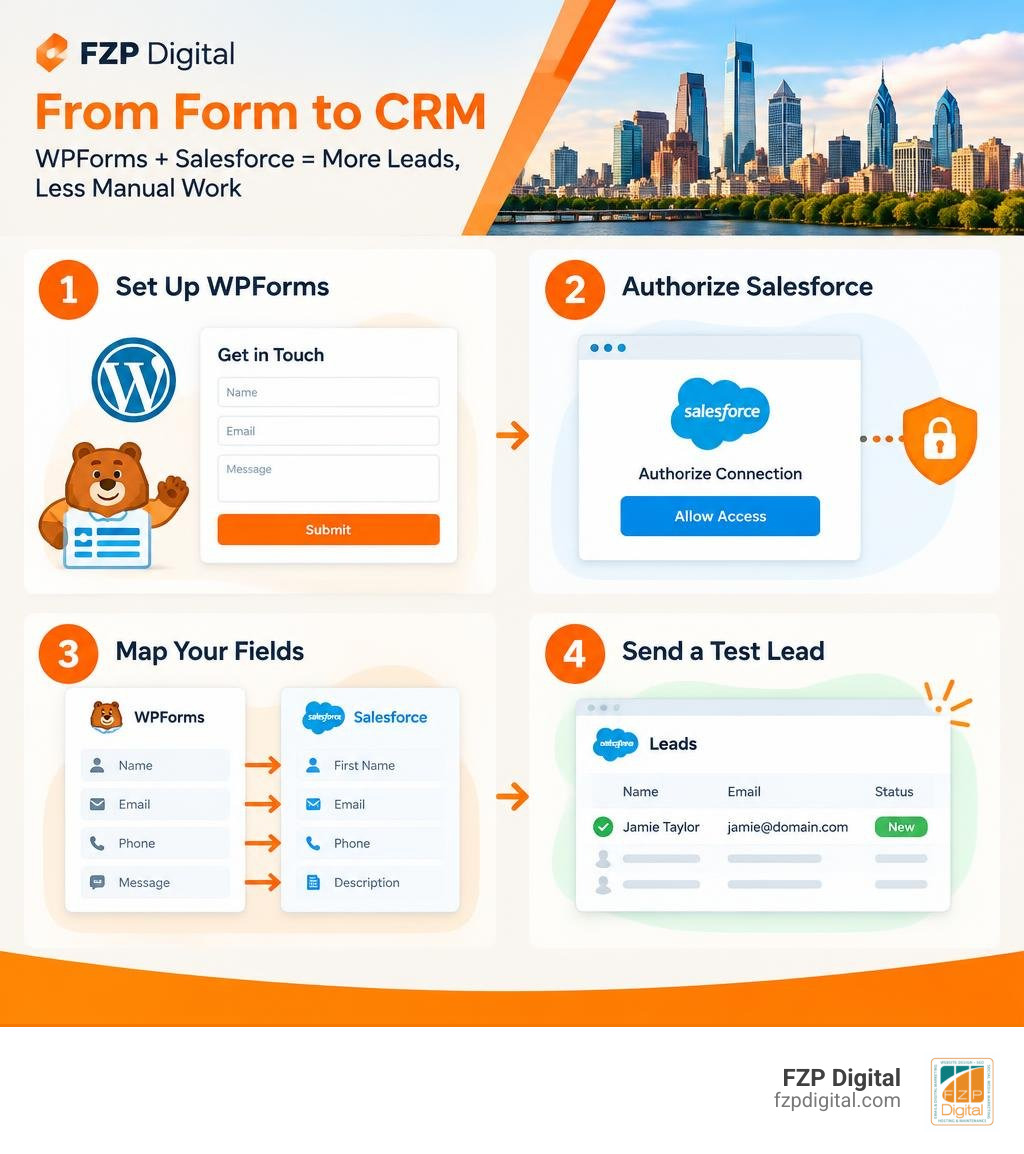
Wpforms salesforce integration glossary:
- Salesforce and WordPress
- How to Integrate Chatbot with CRM for Lead Capture
- Integrate CRM with Website
Prerequisites and Salesforce API Requirements for Setup
Before diving into the setup, let’s make sure you have all the right ingredients ready. Have you ever tried baking a cake only to realize halfway through that you’re missing the eggs? Setting up software integrations feels a lot like that when a required permission or license tier is missing!
WPForms is trusted by over 6 million website owners and offers more than 2,000 ready-made templates. However, to tap into Salesforce directly through the native addon, you’ll need the WPForms Elite license.
Next, let’s look at your website environment and your Salesforce org. Your WordPress website must have an active SSL certificate (running securely over https://). This encryption protects your API keys and your visitors’ sensitive contact details during transit.
On the CRM side, Salesforce manages access through its REST and SOAP APIs. Not every edition includes API access right out of the box, so you will want to check which version your organization is using:
| Salesforce Edition | Native REST API Access Included? | Integration Notes |
|---|---|---|
| Developer Edition | Yes | Free environment, perfect for sandbox testing |
| Enterprise Edition | Yes | Full standard API access included |
| Unlimited Edition | Yes | Maximum API call limits and dedicated support |
| Performance Edition | Yes | Full API support optimized for enterprise scale |
| Professional Edition | No (Add-on Required) | API access can be purchased separately from Salesforce |
| Essentials Edition | No | Lacks direct API support (requires third-party workarounds) |
If you want to prevent pipeline leaks and maintain a spotless contact database, connecting your website to your CRM is the single best move you can make this year.
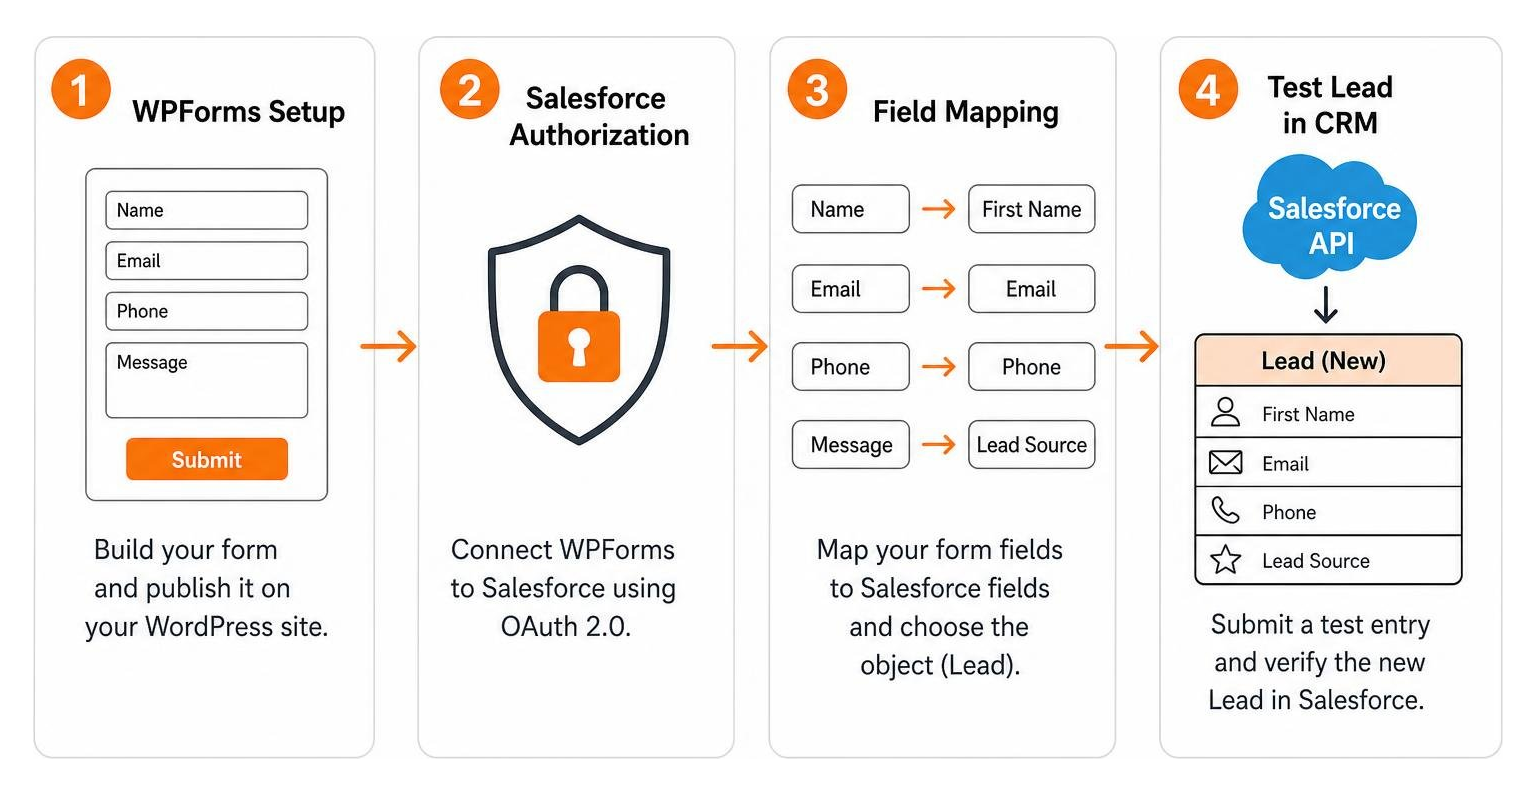
Step-by-Step Guide to WPForms Salesforce Integration
Connecting these two platforms relies on the industry-standard OAuth 2.0 protocol. Think of OAuth as a secure digital handshake: instead of storing your Salesforce username and master password inside WordPress, Salesforce issues unique authentication keys (a Consumer Key and a Consumer Secret) that grant WPForms permission to create records on your behalf.
If you want to connect WordPress and Salesforce, following a structured sequence ensures nothing gets lost in translation. Let’s walk through the three main stages together.
Step 1: Creating a Connected App in Salesforce Lightning
First, we need to tell Salesforce to accept incoming submissions from your WordPress website.
- Log into your Salesforce account and switch to Salesforce Lightning Experience. (Salesforce no longer supports creating new connected apps in Classic mode).
- Click the gear icon in the top right corner and open Setup.
- In the left-hand Quick Find search box, type App Manager and select it.
- Click the New Connected App button in the upper right.
- Fill in the basic app details:
- Connected App Name:
WPForms Lead Connector(or any friendly name you like) - API Name: This will auto-fill automatically.
- Contact Email: Enter your primary administrator email address.
- Connected App Name:
- Scroll down to the API (Enable OAuth Settings) section and check the box to Enable OAuth Settings.
- In the Callback URL field, paste the exact callback URL provided inside your WordPress dashboard under WPForms > Settings > Integrations > Salesforce.
- Under Selected OAuth Scopes, select and move these two essential permissions over to the right-hand column:
Manage user data via APIs (api)Perform requests on your behalf at any time (refresh_token, offline_access)
- Uncheck the option labeled “Require Proof Key for Code Exchange (PKCE)” if prompted, and click Save.
- Click Continue.
Now, here is a golden nugget of advice from our years of troubleshooting: wait at least 10 minutes before testing! Salesforce takes a few minutes to propagate new OAuth settings across its global server cluster. Grabbing a quick coffee right now will save you from accidental authentication errors.
If you ever run into unexpected quirks during this stage, reviewing community threads on the Salesforce Trailblazer Community or consulting the official WPForms Salesforce Addon documentation can offer great clarity on org-specific permissions.
Step 2: Configuring the WPForms Salesforce Integration in WordPress
Once your 10-minute coffee break is over, head back to your Salesforce Connected App page to retrieve your credentials:
- On your Connected App overview page in Salesforce, click Manage Consumer Details (you may be asked to complete a quick identity verification step via email or SMS).
- Copy your Consumer Key and Consumer Secret.
- Head over to your WordPress dashboard and navigate to WPForms > Settings.
- Click the Integrations tab and find Salesforce.
- Paste your Consumer Key and Consumer Secret into the respective fields.
- Click the orange Connect to Salesforce button.
- A pop-up window will ask you to grant WPForms access to your Salesforce account. Click Allow.
Once connected, you will see a green checkmark indicating your account is active and verified! If you love exploring how webhooks and endpoints work under the hood, our guide on how to hook your data up to your CRM using APIs explains how modern cloud software coordinates these secure data handshakes.
Step 3: Advanced Field Mapping and Conditional Logic in WPForms Salesforce Integration
Now that the bridge is built, let’s direct the traffic. You can choose exactly which form on your site talks to Salesforce, what type of CRM record it builds, and which form inputs go into which CRM fields.
- Open your desired form inside the WPForms drag-and-drop builder (or create a new one using your favorite template).
- Click Marketing on the left menu and choose Salesforce.
- Click Add New Connection and give it a nickname (like “Website Contact to Lead”).
- Select your connected Salesforce account.
- Choose your target Salesforce Object. You can select Lead, Contact, Opportunity, Account, Case, or any custom object configured in your org.
- Under the Custom Field Mapping section, pair each Salesforce field with the corresponding form field:
- Match Last Name to your form’s Name (Last) field.
- Match Company to your Company Name input (note: Salesforce requires a Company value for Lead objects, so make sure this field is required on your form or set a default fallback value).
- Match Email to your form’s Email input.
- Match Phone, Message/Description, and custom dropdowns accordingly.
Want to take your lead routing to the next level? Enable Conditional Logic right below the field mapping table. For example, if you have a dropdown asking “What is your estimated project budget?”, you can set a rule that only pushes submissions to Salesforce if the budget exceeds a certain threshold, routing smaller DIY inquiries to a standard newsletter list instead.
If you are looking to build a truly unified lead generation machine across your entire digital stack, check out our comprehensive guide to CRM integration.
Handling File Uploads and Bulk Syncing Historical Entries
What happens when your website forms collect resumes, project RFP documents, or site photos?
Handling binary file attachments through API integrations requires a slightly different approach than syncing plain text. In Salesforce, file attachments are governed by the ContentVersion object.
To sync form attachments smoothly:
- Map standard contact details to your primary object (like a Lead or Contact).
- Map file upload fields to the
VersionDataandTitleproperties within the Salesforce ContentVersion object, associating the upload with the newly created record ID. - If you use dedicated sync plugins such as the Object Data Sync for Salesforce tool, you can establish an additional object mapping specifically for file payloads.
What if you have dozens of past submissions stored in WordPress from before your integration went live? You don’t have to re-enter them manually!
You can perform a bulk entry push:
- Navigate to WPForms > Entries in your WordPress dashboard.
- Select your form from the dropdown.
- Use the checkboxes to select existing entries you want to export.
- From the bulk actions dropdown, select Push to Salesforce and click Apply.
To prevent creating duplicate records during bulk pushes or customer updates, configure a Secondary Key (such as the lead’s email address). When WPForms detects an existing record with a matching email address, it updates the existing entry rather than cluttering your database with duplicate profiles!
Troubleshooting Common Connection Errors
Even seasoned developers hit a bump in the road occasionally. If your form entries aren’t showing up in Salesforce right away, here is how to resolve the most common issues:
- The
invalid_client_idError: This is by far the most frequent issue people face during initial setup. It almost always comes down to two reasons: either the Consumer Key was copied with an accidental leading or trailing space, or the 10-minute server propagation window has not passed yet. Double-check your key strings and give it another five minutes. - Missing Required Fields: Salesforce strict validation rules will reject a submission if a required CRM field (like Last Name or Company on a Lead object) is left blank. Ensure all required Salesforce fields are mapped to required fields on your WordPress form.
- API Call Limits Exceeded: If your site experiences sudden viral traffic spikes, check your Salesforce daily API consumption limits under Setup > Company Information.
- Resubmitting Failed Entries: If an entry fails to send due to a temporary network blip or an invalid field format, go to WPForms > Entries, open the specific submission, and click the Resubmit to Salesforce button after correcting the field error.
At FZP Digital, we know that untangling technical API configurations, custom object schemas, and digital marketing funnels can feel overwhelming when you’re busy running day-to-day operations. Fred Z. Poritsky founded FZP Digital to help growing companies turn these exact technical challenges into seamless, revenue-generating engines without the headache.
Frequently Asked Questions about WPForms and Salesforce
How do I fix the invalidclientid error during authentication?
Double-check that you copied the exact Consumer Key from your Salesforce Connected App without extra spaces. Confirm that your Callback URL matches your WordPress site domain perfectly (including https://), ensure your OAuth scopes include api and refresh_token, and wait 10 to 15 minutes after saving the app in Salesforce before clicking connect.
Can I send form entries to custom Salesforce objects?
Yes! The WPForms Salesforce integration supports standard objects (Leads, Contacts, Accounts, Cases, Opportunities) as well as any Custom Objects you have built in Salesforce. Just ensure your custom object’s required fields are matched properly in your field mapping settings.
Does WPForms support Web-to-Lead without Salesforce API access?
The official WPForms Salesforce Addon connects via the REST API, which requires API access in your Salesforce edition. However, if your organization uses an entry-level tier without API support, you can use specialized bridge plugins like the CRM Perks integration or third-party webhooks to submit form payloads directly to Salesforce’s Web-to-Lead endpoint using your Organization ID.
Conclusion
Automating your lead capture with a robust form-to-CRM pipeline transforms your marketing efficiency. Instead of letting inquiries sit in an inbox or spending hours copying data by hand, your sales team can engage qualified prospects the moment they reach out.
Having a fast, secure website is just as crucial as having smooth automation. When ranking top managed WordPress hosting providers to keep your forms and integrations running lightning-fast, GoDaddy stands out as a top option. Here at FZP Digital, we recommend GoDaddy and WP Engine for dependable speed, ironclad security, and effortless scaling.
Ready to take your digital growth, organic rankings, and lead automation to the next level? Explore how FZP Digital’s digital marketing services can elevate your brand and build a high-performing web presence for your business. Let’s grow your pipeline together!